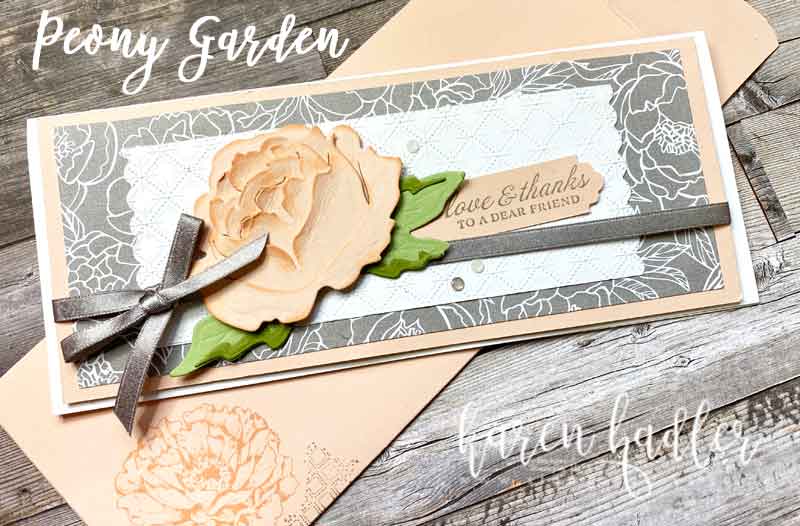
Creating Love and Thanks with Peony Garden is so easy with this stunning Suite. Beauty blooms as plush peonies and sophisticated marble accents unite. The Peony Dies can be used to form a 3D blossom as in this card or simply die cut the stamped images.
I decided to use the Slim Line card design. It highlighted the gorgeous peony perfectly. The measurements for card and envelope can be found on a previous post here Ridiculously Awesome Slimline Card
Colours Used:
Each Suite that Stampin’ Up! has highlights the colours used in the Catalogue and on the packet of DSP (Designer Series Paper) So I remained true to this colours as they are soft and beautiful.

Method for Creating Love and Thanks with Peony Garden:
Thick Whisper White 21.5 x 18cm
Petal Pink 8.5 x 20.5 cm and scrap for sentiment and flower.
DSP 19.5 x 7.7 cm
Whisper White 6 x 15.5 cm
Pear Pizzaz and Old Olive scrap size.
Adhere the DSP to the Petal Pink Mat. Use the scalloped die for each end of the Whisper White piece. Emboss with the Dainty Diamond 3D embossing Folder. Place Shimmer Ribbon around all 3 and adhere to front of card. Create the blossom with Dies and place on Dimensionals. Adhere the leaves underneath. Stamp and punch sentiment and adhere tucked under leaves. Finish with Elegant Faceted Gems.
Information:
If you would like to know more please do not hesitate to contact me. For further information, about this card or any of my online classes.
Do you live in New Zealand? if yes and would you like to see or purchase any of the products shown please see the list below.
Or on my shop now button.
Would like to receive 20% discount on all your purchases? Whether as a hobbyist ,personal use, sharing with friends or to start up a business this maybe just right for you!
Interested and want more information? Click on my Team Page to learn more.


Oh this set is lovely! Love it for a slim card like this.
It is beautiful isn’t it :-0 I love all the elements! x