Well… this card nearly didn’t happen! After a flooded craft room and a power cut right as I hit “go live,” I was determined to come back and share something special—and I’m so glad I did because this project is such a fun one.
Today’s card features the Pop-Up Petals Bundle, and I specifically wanted to show how to use some of those “mystery” dies that can leave you wondering what on earth they’re for. Trust me—once you see them in action, you’ll love them!
The Inspiration
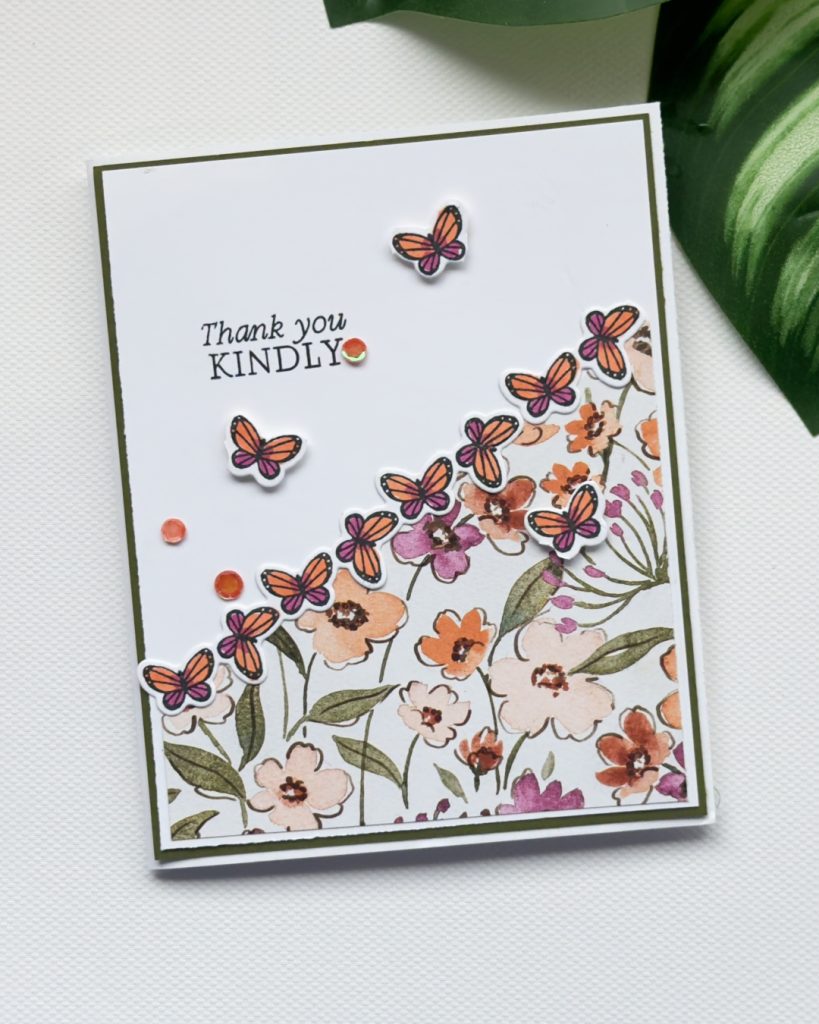
I’ve paired the bundle with the beautiful Floral Charm Designer Series Paper, pulling out those gorgeous tones of Timid Tiger, Berry Burst, and Granny Apple Green. The result is a soft, fresh floral card with a little pop of brightness from the butterflies.
To keep the focus on the inside surprise, I kept the front clean and simple with a delicate butterfly border and a “Thank You Kindly” sentiment.

Card Front Details
The front design is all about balance and movement:
- A strip of floral DSP creates a soft base along the bottom
- Die-cut butterflies “flutter” across the card for dimension
- A simple stamped sentiment keeps it elegant
- A few sequins add just the right amount of sparkle
Sometimes less really is more—especially when you’ve got a wow moment waiting inside!
The Pop-Up Magic ✨
Now for the fun part…
Those unusual dies in the Pop-Up Petals set? They’re designed to create built-in pop-up mechanisms—no complicated measuring required.
Here’s the basic idea:
- Line the die up along the centre fold of your card
- Run it through your die-cutting machine
- Fold along the embossed score lines
- Attach the panels by gluing one side, closing the card, then securing the other side
And just like that—you get a perfectly aligned pop-up feature!
I added wood-textured panels to create little flower boxes, then layered stamped and coloured florals inside for dimension. When the card opens, everything pops forward beautifully.
Colouring Tips
For the florals and butterflies, I used:
- Timid Tiger (including stamping off for softer tones)
- Berry Burst for contrast and detail
- Granny Apple Green + Mossy Meadow for natural-looking leaves
Layering light and full-strength stamping really brings the images to life without overcomplicating things.
Finishing Touches
To complete the card:
- Add a few extra butterflies for movement
- Use dimensionals to lift elements
- Finish with coordinating sequins
And that’s it—a card that looks impressive but is surprisingly simple

Video Sharing Easy Pop-Up Petals Thank You Tutorial (click on photo below)
or HERE

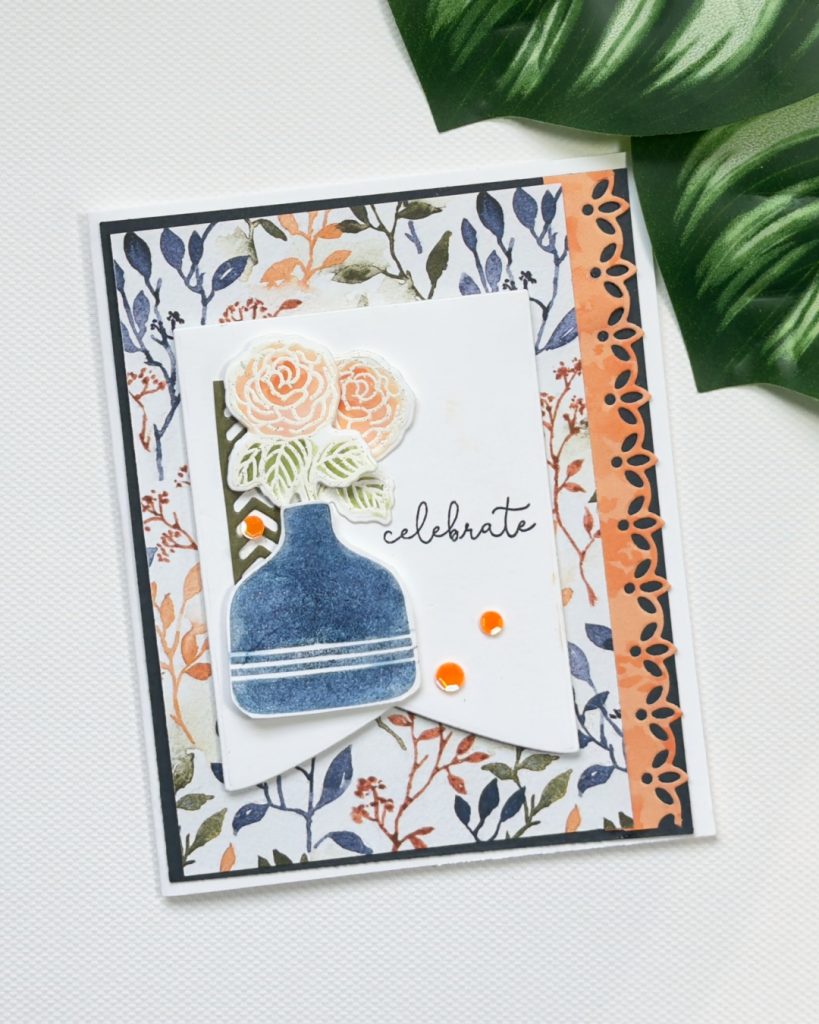
This second card shows just how versatile the Pop-Up Petals Bundle really is. Instead of an interactive design, I kept things beautifully layered and elegant with a soft floral background, a delicate die-cut border, and a simple focal point using the vase and blooms. The muted blues paired with warm peach tones create a calm, sophisticated look, while the “celebrate” sentiment keeps it perfect for so many occasions. It’s a great reminder that this bundle works just as well for quick, classic cards as it does for more detailed pop-up designs.
Final Thoughts
I absolutely love how versatile this bundle is. You can go all out with interactive pop-ups or keep things simple with stamped florals and vases. Either way, it’s a winner.
Related Posts to Easy Pop-Up Petals Thank You Tutorial
Stay creative and happy crafting!
Want to receive regular tips and inspiration don’t miss out and sign up to get my newsletter delivered to your inbox!
Newsletter
Live in New Zealand? if yes and would you like to purchase any of the items shown if you click on each photo it will take you to a list. For the Bundle click below to purchase.

Would like to receive 20% discount on all your purchases? Whether as a hobbyist ,personal use, sharing with friends or to start up a business this maybe just right for you!
Interested and want more information? Click on my TEAM PAGE to learn more.
Thanks so much for stopping by I hope you enjoyed this post. I would love you to leave a comment.
Happy Crafting


Leave a Reply